
Introduction
Without Single Sign-On (SSO), users need separate credentials for every tool they access. That means more weak passwords, more forgotten accounts, and more security gaps.
Deploying SSO with FreeIPA and Keycloak solves this. Keycloak acts as the authentication broker and OIDC provider. It takes identities from FreeIPA using LDAP. Together, they give you one login that works everywhere.
In this guide, I used Grafana as the target application to demonstrate the setup. Keycloak runs in Docker to keep things portable. FreeIPA runs on a CentOS machine, since RHEL-based systems are strongly recommended for it.
By the end, you’ll know exactly how to deploy SSO with FreeIPA and Keycloak, including role mappings that connect FreeIPA groups to your applications.
Architecture diagram:

Procedure
I’ve used 4 dedicated Virtual Machines:
- CentOS VM to serve identity management with freeIPA.
- CentOS VM to serve replica for the freeIPA.
- CentOS VM for Keycloak.
- A VM to serve an app (Grafana in my case) to authenticate into.
- For resource requirements I’ve used 4Gig of RAM and 4 cores of CPU for each of the VMs.
- Install Docker for the Keycloak VM.
- Set static IP for each VM.
- SSL certificates for each VM.
Because every VM needs to have a fully qualified domain name. Make it so by editing /etc/hosts for every machine or configure a dns server. For example:
10.100.100.72   grafana.test.inc
10.100.100.70   keycloak.test.inc
10.100.100.71   freeipa.test.inc
10.100.100.73	ipa-replica.test.inc
FreeIPA Installation
FreeIPA is a free, open-source tool that manages user identities on Linux and Unix systems. It combines several services in one place, LDAP, Kerberos, DNS, and certificate management, so you don’t have to set them up separately. It’s a great fit for teams that want to manage users, machines, and access policies from a single system, without paying for commercial options like Active Directory.
I would suggest to not run FreeIPA in containers. It’s a deeply integrated piece of infrastructure (DNS, Kerberos, LDAP), and when something breaks, you want full system control to debug and recover. A dedicated RHEL VM is the right way to run it.
Make sure to use a CentOS machine, set a static IP and FQDN resolution before you continue.
Then, Install freeipa-server and other packages by running:
$ dnf install -y freeipa-server-dns freeipa-server firewalld vimAfterwards, Apply these firewall rules:
$ systemctl enable --now firewalld
$ firewall-cmd --add-service=freeipa-ldap --add-service=freeipa-ldaps --add-service=ldap --add-service=freeipa-4 --permanent
$ firewall-cmd --reload
As previously mentioned, IPA needs the hostname of the machine to be the exact FQDN needed. So verify by:
$ hostname --fqdn # should output freeipa.test.incThen install by running ipa-server-install:
ipa-server-install –setup-dns –setup-ca –forwarder 8.8.8.8
$ ipa-server-install --setup-dns --forwarder 8.8.8.8

The log file for this installation can be found in /var/log/ipaserver-install.log
==============================================================================
This program will set up the IPA Server.
Version 4.13.1

This includes:
  * Configure a stand-alone CA (dogtag) for certificate management
  * Configure the NTP client (chronyd)
  * Create and configure an instance of Directory Server
  * Create and configure a Kerberos Key Distribution Center (KDC)
  * Configure Apache (httpd)
  * Configure DNS (bind)
  * Configure SID generation
  * Configure the KDC to enable PKINIT

To accept the default shown in brackets, press the Enter key.

Enter the fully qualified domain name of the computer
on which you're setting up server software. Using the form
.
Example: master.example.com


Server host name [freeipa.test.inc]:

Warning: skipping DNS resolution of host freeipa.test.inc
The domain name has been determined based on the host name.

Please confirm the domain name [test.inc]:

The kerberos protocol requires a Realm name to be defined.
This is typically the domain name converted to uppercase.

Please provide a realm name [TEST.INC]:
Certain directory server operations require an administrative user.
This user is referred to as the Directory Manager and has full access
to the Directory for system management tasks and will be added to the
instance of directory server created for IPA.
The password must be at least 8 characters long.

Directory Manager password:
Password (confirm):

The IPA server requires an administrative user, named 'admin'.
This user is a regular system account used for IPA server administration.

IPA admin password:
Password (confirm):

Checking DNS domain test.inc., please wait ...
Checking DNS forwarders, please wait ...
Do you want to search for missing reverse zones? [yes]:
Checking DNS domain 100.100.10.in-addr.arpa., please wait ...
Do you want to create reverse zone for IP 10.100.100.71 [yes]:
Please specify the reverse zone name [100.100.10.in-addr.arpa.]:
Checking DNS domain 100.100.10.in-addr.arpa., please wait ...
Using reverse zone(s) 100.100.10.in-addr.arpa.
Trust is configured but no NetBIOS domain name found, setting it now.
Enter the NetBIOS name for the IPA domain.
Only up to 15 uppercase ASCII letters, digits and dashes are allowed.
Example: EXAMPLE.


NetBIOS domain name [TEST]:

Do you want to configure chrony with NTP server or pool address? [no]:

The IPA Master Server will be configured with:
Hostname:       freeipa.test.inc
IP address(es): 10.100.100.71
Domain name:    test.inc
Realm name:     TEST.INC

The CA will be configured with:
Subject DN:   CN=Certificate Authority,O=TEST.INC
Subject base: O=TEST.INC
Chaining:     self-signed

BIND DNS server will be configured to serve IPA domain with:
Forwarders:       8.8.8.8
Forward policy:   only
Reverse zone(s):  100.100.10.in-addr.arpa.

Continue to configure the system with these values? [no]: yes

The following operations may take some minutes to complete.
Please wait until the prompt is returned.

Disabled p11-kit-proxy
Synchronizing time
No SRV records of NTP servers found and no NTP server or pool address was provided.
Using default chrony configuration.
Attempting to sync time with chronyc.
Time synchronization was successful.
Configuring directory server (dirsrv). Estimated time: 30 seconds
  [1/43]: creating directory server instance
Validate installation settings ...
Create file system structures ...
Perform SELinux labeling ...
Create database backend: dc=test,dc=inc ...
Perform post-installation tasks ...
  [2/43]: tune ldbm plugin
  [3/43]: adding default schema
  [4/43]: enabling memberof plugin
  [5/43]: enabling winsync plugin
  [6/43]: configure password logging
  [7/43]: configuring replication version plugin
  [8/43]: enabling IPA enrollment plugin
  [9/43]: configuring uniqueness plugin
  [10/43]: configuring uuid plugin
  [11/43]: configuring modrdn plugin
  [12/43]: configuring DNS plugin
  [13/43]: enabling entryUSN plugin
  [14/43]: configuring lockout plugin
  [15/43]: configuring graceperiod plugin
  [16/43]: configuring topology plugin
  [17/43]: creating indices
  [18/43]: enabling referential integrity plugin
  [19/43]: configuring certmap.conf
  [20/43]: configure new location for managed entries
  [21/43]: configure dirsrv ccache and keytab
  [22/43]: enabling SASL mapping fallback
  [23/43]: restarting directory server
  [24/43]: adding sasl mappings to the directory
  [25/43]: adding default layout
  [26/43]: adding delegation layout
  [27/43]: creating container for managed entries
  [28/43]: configuring user private groups
  [29/43]: configuring netgroups from hostgroups
  [30/43]: creating default Sudo bind user
  [31/43]: creating default Auto Member layout
  [32/43]: adding range check plugin
  [33/43]: creating default HBAC rule allow_all
  [34/43]: adding entries for topology management
  [35/43]: initializing group membership
  [36/43]: adding master entry
  [37/43]: initializing domain level
  [38/43]: configuring Posix uid/gid generation
  [39/43]: adding replication acis
  [40/43]: activating sidgen plugin
  [41/43]: activating extdom plugin
  [42/43]: configuring directory to start on boot
  [43/43]: restarting directory server
Done configuring directory server (dirsrv).
Configuring Kerberos KDC (krb5kdc)
  [1/11]: adding kerberos container to the directory
  [2/11]: configuring KDC
  [3/11]: initialize kerberos container
  [4/11]: adding default ACIs
  [5/11]: creating a keytab for the directory
  [6/11]: creating a keytab for the machine
  [7/11]: adding the password extension to the directory
  [8/11]: creating anonymous principal
  [9/11]: starting the KDC
  [10/11]: configuring KDC to start on boot
  [11/11]: enable PAC ticket signature support
Done configuring Kerberos KDC (krb5kdc).
Configuring kadmin
  [1/2]: starting kadmin
  [2/2]: configuring kadmin to start on boot
Done configuring kadmin.
Configuring ipa-custodia
  [1/5]: Making sure custodia container exists
  [2/5]: Generating ipa-custodia config file
  [3/5]: Generating ipa-custodia keys
  [4/5]: starting ipa-custodia
  [5/5]: configuring ipa-custodia to start on boot
Done configuring ipa-custodia.
Configuring certificate server (pki-tomcatd). Estimated time: 3 minutes
  [1/32]: configuring certificate server instance


  [2/32]: stopping certificate server instance to update CS.cfg
  [3/32]: backing up CS.cfg
  [4/32]: Add ipa-pki-wait-running
Set start up timeout of pki-tomcatd service to 90 seconds
  [5/32]: secure AJP connector
  [6/32]: reindex attributes
  [7/32]: exporting Dogtag certificate store pin
  [8/32]: disabling nonces
  [9/32]: set up CRL publishing
  [10/32]: enable PKIX certificate path discovery and validation
  [11/32]: authorizing RA to modify profiles
  [12/32]: authorizing RA to manage lightweight CAs
  [13/32]: Ensure lightweight CAs container exists
  [14/32]: Enable lightweight CA monitor
  [15/32]: Ensuring backward compatibility
  [16/32]: updating IPA configuration
  [17/32]: starting certificate server instance
  [18/32]: configure certmonger for renewals
  [19/32]: requesting RA certificate from CA
  [20/32]: publishing the CA certificate
  [21/32]: adding RA agent as a trusted user
  [22/32]: configure certificate renewals
  [23/32]: Configure HTTP to proxy connections
  [24/32]: enabling CA instance
  [25/32]: importing IPA certificate profiles
Getting PKI server info from /pki/v2/info
Getting PKI server info from /pki/v2/info
Getting PKI server info from /pki/v2/info
Getting PKI server info from /pki/v2/info
Getting PKI server info from /pki/v2/info
  [26/32]: migrating certificate profiles to LDAP
  [27/32]: adding default CA ACL
  [28/32]: adding 'ipa' CA entry
Getting PKI server info from /pki/v2/info
  [29/32]: Recording random serial number state
  [30/32]: Recording HSM configuration state
  [31/32]: configuring certmonger renewal for lightweight CAs
  [32/32]: deploying ACME service
Done configuring certificate server (pki-tomcatd).
Configuring directory server (dirsrv)
  [1/3]: configuring TLS for DS instance
  [2/3]: adding CA certificate entry
  [3/3]: restarting directory server
Done configuring directory server (dirsrv).
Configuring ipa-otpd
  [1/2]: starting ipa-otpd
  [2/2]: configuring ipa-otpd to start on boot
Done configuring ipa-otpd.
Configuring the web interface (httpd)
  [1/21]: stopping httpd
  [2/21]: backing up ssl.conf
  [3/21]: configuring mod_ssl certificate paths
  [4/21]: setting mod_ssl protocol list
  [5/21]: configuring mod_ssl log directory
  [6/21]: disabling mod_ssl OCSP
  [7/21]: adding URL rewriting rules
  [8/21]: configuring httpd
Nothing to do for configure_httpd_wsgi_conf
  [9/21]: setting up httpd keytab
  [10/21]: configuring Gssproxy
  [11/21]: setting up ssl
  [12/21]: configure certmonger for renewals
  [13/21]: publish CA cert
  [14/21]: clean up any existing httpd ccaches
  [15/21]: enable ccache sweep
  [16/21]: configuring SELinux for httpd
  [17/21]: create KDC proxy config
  [18/21]: enable KDC proxy
  [19/21]: starting httpd
  [20/21]: configuring httpd to start on boot
  [21/21]: enabling oddjobd
Done configuring the web interface (httpd).
Configuring Kerberos KDC (krb5kdc)
  [1/1]: installing X509 Certificate for PKINIT
Done configuring Kerberos KDC (krb5kdc).
Applying LDAP updates
Upgrading IPA:. Estimated time: 1 minute 30 seconds
  [1/10]: stopping directory server
  [2/10]: saving configuration
  [3/10]: disabling listeners
  [4/10]: enabling DS global lock
  [5/10]: disabling Schema Compat
  [6/10]: starting directory server
  [7/10]: upgrading server
  [8/10]: stopping directory server
  [9/10]: restoring configuration
  [10/10]: starting directory server
Done.
Restarting the KDC
dnssec-validation yes
Configuring DNS (named)
  [1/13]: generating rndc key file
  [2/13]: adding DNS container
  [3/13]: setting up our zone
  [4/13]: setting up reverse zone
  [5/13]: setting up our own record
  [6/13]: setting up records for other masters
  [7/13]: adding NS record to the zones
  [8/13]: setting up kerberos principal
  [9/13]: setting up LDAPI autobind
  [10/13]: setting up named.conf
created new /etc/named.conf
created named user config '/etc/named/ipa-ext.conf'
created named user config '/etc/named/ipa-options-ext.conf'
created named user config '/etc/named/ipa-logging-ext.conf'
  [11/13]: setting up server configuration
  [12/13]: configuring named to start on boot
  [13/13]: changing resolv.conf to point to ourselves
Done configuring DNS (named).
Restarting the web server to pick up resolv.conf changes
Configuring DNS key synchronization service (ipa-dnskeysyncd)
  [1/7]: checking status
  [2/7]: setting up bind-dyndb-ldap working directory
  [3/7]: setting up kerberos principal
  [4/7]: setting up SoftHSM
  [5/7]: adding DNSSEC containers
  [6/7]: creating replica keys
  [7/7]: configuring ipa-dnskeysyncd to start on boot
Done configuring DNS key synchronization service (ipa-dnskeysyncd).
Restarting ipa-dnskeysyncd
Restarting named
Updating DNS system records
Configuring SID generation
  [1/8]: adding RID bases
  [2/8]: creating samba domain object
  [3/8]: adding admin(group) SIDs
  [4/8]: updating Kerberos config
'dns_lookup_kdc' already set to 'true', nothing to do.
  [5/8]: activating sidgen task
  [6/8]: restarting Directory Server to take MS PAC and LDAP plugins changes into account
  [7/8]: adding fallback group
  [8/8]: adding SIDs to existing users and groups
This step may take considerable amount of time, please wait..
Done.
Configuring client side components
This program will set up IPA client.
Version 4.13.1

Using existing certificate '/etc/ipa/ca.crt'.
Client hostname: freeipa.test.inc
Realm: TEST.INC
DNS Domain: test.inc
IPA Server: freeipa.test.inc
BaseDN: dc=test,dc=inc

Configured /etc/sssd/sssd.conf
Systemwide CA database updated.
Adding SSH public key from /etc/ssh/ssh_host_rsa_key.pub
Adding SSH public key from /etc/ssh/ssh_host_ecdsa_key.pub
Adding SSH public key from /etc/ssh/ssh_host_ed25519_key.pub
SSSD enabled
Configured /etc/openldap/ldap.conf
Configured /etc/ssh/ssh_config
Configured /etc/ssh/sshd_config.d/04-ipa.conf
Configuring test.inc as NIS domain.
Client configuration complete.
The ipa-client-install command was successful

Enabling and restarting the IPA service
==============================================================================
Setup complete

Next steps:
	1. You must make sure these network ports are open:
		TCP Ports:
		  * 80, 443: HTTP/HTTPS
		  * 389, 636: LDAP/LDAPS
		  * 88, 464: kerberos
		  * 53: bind
		UDP Ports:
		  * 88, 464: kerberos
		  * 53: bind
		  * 123: ntp

	2. You can now obtain a kerberos ticket using the command: 'kinit admin'
	   This ticket will allow you to use the IPA tools (e.g., ipa user-add)
	   and the web user interface.

Be sure to back up the CA certificates stored in /root/cacert.p12
These files are required to create replicas. The password for these
files is the Directory Manager password
The ipa-server-install command was successful
Authenticate as admin by running:
$ kinit admin
Password for admin@TEST.INC:
Add a bind user by running:
$ ipa user-add keycloak-bind \
  --first=Keycloak \
  --last=ServiceAccount \
  --password
Password:
Enter Password again to verify:
--------------------------
Added user "keycloak-bind"
--------------------------
  User login: keycloak-bind
  First name: Keycloak
  Last name: ServiceAccount
  Full name: Keycloak ServiceAccount
  Display name: Keycloak ServiceAccount
  Initials: KS
  Home directory: /home/keycloak-bind
  GECOS: Keycloak ServiceAccount
  Login shell: /bin/sh
  Principal name: keycloak-bind@TEST.INC
  Principal alias: keycloak-bind@TEST.INC
  User password expiration: 20260413151106Z
  Email address: keycloak-bind@test.inc
  UID: 27600003
  GID: 27600003
  Password: True
  Member of groups: ipausers
  Kerberos keys available: True
Take note of the bind user password since we will use it later.
Set a non expiring password for the bind user by running:
$ ipa user-mod keycloak-bind --setattr=krbPasswordExpiration=20380101000000Z
-----------------------------
Modified user "keycloak-bind"
-----------------------------
  User login: keycloak-bind
  First name: Keycloak
  Last name: ServiceAccount
  Home directory: /home/keycloak-bind
  Login shell: /bin/sh
  Principal name: keycloak-bind@TEST.INC
  Principal alias: keycloak-bind@TEST.INC
  User password expiration: 20380101000000Z
  Email address: keycloak-bind@test.inc
  UID: 27600003
  GID: 27600003
  Account disabled: False
  Password: True
  Member of groups: ipausers
  Kerberos keys available: True
Install the CA to the server:
$ ipa-cacert-manage install ca.pem
Installing CA certificate, please wait
Verified E=,CN=,OU=,O=,L=,ST=,C=
CA certificate successfully installed
The ipa-cacert-manage command was successful

$ ipa-certupdate
Updating certificates from server freeipa.test.inc
Systemwide CA database updated.
Systemwide CA database updated.

$ ipa-server-certinstall -w -d freeipa.test.inc.key freeipa.test.inc.crt
Directory Manager password:

Enter private key unlock password:

Please restart ipa services after installing certificate (ipactl restart)
The ipa-server-certinstall command was successful
Restart the services:
$ ipactl restart
Restarting Directory Service
Restarting krb5kdc Service
Restarting kadmin Service
Restarting httpd Service
Restarting ipa-custodia Service
Restarting pki-tomcatd Service
Restarting ipa-otpd Service
ipa: INFO: The ipactl command was successful
Check status:
$ ipactl status
Directory Service: RUNNING
krb5kdc Service: RUNNING
kadmin Service: RUNNING
httpd Service: RUNNING
ipa-custodia Service: RUNNING
pki-tomcatd Service: RUNNING
ipa-otpd Service: RUNNING
ipa: INFO: The ipactl command was successful
Now FreeIPA is up and running.
High Availability FreeIPA
In my case the architecture had to work under two regions, so I replicated IPA as a multi master deployment.
On the replica VM do the following:
$ dnf install -y freeipa-server ipa-server-dns firewalld vim Configure hostname to be exactly as the wanted FQDN
$ hostname --fqdn
ipa-replica.test.inc
Allow firewall rules
$ systemctl enable --now firewalld
$ firewall-cmd --add-service=freeipa-ldap --add-service=freeipa-ldaps --add-service=ldap --add-service=freeipa-4 --permanent
$ firewall-cmd --reload
Install as replica:
$ ipa-replica-install --server freeipa.test.inc --domain test.inc --principal admin   --admin-password
Configuring client side components
This program will set up IPA client.
Version 4.13.1

Client hostname: ipa-replica.test.inc
Realm: TEST.INC
DNS Domain: test.inc
IPA Server: freeipa.test.inc
BaseDN: dc=test,dc=inc

Synchronizing time
No SRV records of NTP servers found and no NTP server or pool address was provided.
Using default chrony configuration.
Attempting to sync time with chronyc.
Time synchronization was successful.
Successfully retrieved CA cert
    Subject:     CN=Certificate Authority,O=TEST.INC
    Issuer:      CN=Certificate Authority,O=TEST.INC
    Valid From:  2026-04-14 10:51:53+00:00
    Valid Until: 2046-04-14 10:51:53+00:00

    Subject:     E=,CN,OU=,O=,L=,ST=,C=
    Issuer:      E=,CN,OU=,O=,L=,ST=,C=
    Valid From:  2026-03-12 09:48:19+00:00
    Valid Until: 2031-03-11 09:48:19+00:00

Enrolled in IPA realm TEST.INC
Created /etc/ipa/default.conf
Configured /etc/sssd/sssd.conf
Systemwide CA database updated.
Hostname (ipa-replica.test.inc) does not have A/AAAA record.
Failed to update DNS records.
Missing A/AAAA record(s) for host ipa-replica.test.inc: 10.100.100.73.
Missing reverse record(s) for address(es): 10.100.100.73.
Adding SSH public key from /etc/ssh/ssh_host_rsa_key.pub
Adding SSH public key from /etc/ssh/ssh_host_ecdsa_key.pub
Adding SSH public key from /etc/ssh/ssh_host_ed25519_key.pub
Could not update DNS SSHFP records.
SSSD enabled
Configured /etc/openldap/ldap.conf
Configured /etc/ssh/ssh_config
Configured /etc/ssh/sshd_config.d/04-ipa.conf
Configuring test.inc as NIS domain.
Configured /etc/krb5.conf for IPA realm TEST.INC
Client configuration complete.
The ipa-client-install command was successful

Run connection check to master
Connection check OK
Disabled p11-kit-proxy
Configuring directory server (dirsrv). Estimated time: 30 seconds
  [1/40]: creating directory server instance
Validate installation settings ...
Create file system structures ...
Perform SELinux labeling ...
Create database backend: dc=test,dc=inc ...
Perform post-installation tasks ...
  [2/40]: tune ldbm plugin
  [3/40]: adding default schema
  [4/40]: enabling memberof plugin
  [5/40]: enabling winsync plugin
  [6/40]: configure password logging
  [7/40]: configuring replication version plugin
  [8/40]: enabling IPA enrollment plugin
  [9/40]: configuring uniqueness plugin
  [10/40]: configuring uuid plugin
  [11/40]: configuring modrdn plugin
  [12/40]: configuring DNS plugin
  [13/40]: enabling entryUSN plugin
  [14/40]: configuring lockout plugin
  [15/40]: configuring graceperiod plugin
  [16/40]: configuring topology plugin
  [17/40]: creating indices
  [18/40]: enabling referential integrity plugin
  [19/40]: configuring certmap.conf
  [20/40]: configure new location for managed entries
  [21/40]: configure dirsrv ccache and keytab
  [22/40]: enabling SASL mapping fallback
  [23/40]: restarting directory server
  [24/40]: creating DS keytab
  [25/40]: ignore time skew for initial replication
  [26/40]: setting up initial replication
Starting replication, please wait until this has completed.
Update in progress, 3 seconds elapsed
Update succeeded

  [27/40]: prevent time skew after initial replication
  [28/40]: adding sasl mappings to the directory
  [29/40]: updating schema
  [30/40]: setting Auto Member configuration
  [31/40]: enabling S4U2Proxy delegation
  [32/40]: initializing group membership
  [33/40]: adding master entry
  [34/40]: initializing domain level
  [35/40]: configuring Posix uid/gid generation
  [36/40]: adding replication acis
  [37/40]: activating sidgen plugin
  [38/40]: activating extdom plugin
  [39/40]: configuring directory to start on boot
  [40/40]: restarting directory server
Done configuring directory server (dirsrv).
Configuring Kerberos KDC (krb5kdc)
  [1/6]: configuring KDC
  [2/6]: adding the password extension to the directory
  [3/6]: creating anonymous principal
  [4/6]: starting the KDC
  [5/6]: configuring KDC to start on boot
  [6/6]: enable PAC ticket signature support
Done configuring Kerberos KDC (krb5kdc).
Configuring kadmin
  [1/2]: starting kadmin
  [2/2]: configuring kadmin to start on boot
Done configuring kadmin.
Configuring directory server (dirsrv)
  [1/3]: configuring TLS for DS instance
Could not add certificate to service ldap/ipa-replica.test.inc@TEST.INC entry: no modifications to be performed
  [2/3]: importing CA certificates from LDAP
  [3/3]: restarting directory server
Done configuring directory server (dirsrv).
Configuring the web interface (httpd)
  [1/21]: stopping httpd
  [2/21]: backing up ssl.conf
  [3/21]: configuring mod_ssl certificate paths
  [4/21]: setting mod_ssl protocol list
  [5/21]: configuring mod_ssl log directory
  [6/21]: disabling mod_ssl OCSP
  [7/21]: adding URL rewriting rules
  [8/21]: configuring httpd
Nothing to do for configure_httpd_wsgi_conf
  [9/21]: setting up httpd keytab
  [10/21]: configuring Gssproxy
  [11/21]: setting up ssl
  [12/21]: configure certmonger for renewals
  [13/21]: publish CA cert
  [14/21]: clean up any existing httpd ccaches
  [15/21]: enable ccache sweep
  [16/21]: configuring SELinux for httpd
  [17/21]: create KDC proxy config
  [18/21]: enable KDC proxy
  [19/21]: starting httpd
  [20/21]: configuring httpd to start on boot
  [21/21]: enabling oddjobd
Done configuring the web interface (httpd).
Configuring ipa-otpd
  [1/2]: starting ipa-otpd
  [2/2]: configuring ipa-otpd to start on boot
Done configuring ipa-otpd.
Custodia uses 'freeipa.test.inc' as master peer.
Configuring ipa-custodia
  [1/4]: Generating ipa-custodia config file
  [2/4]: Generating ipa-custodia keys
  [3/4]: starting ipa-custodia
  [4/4]: configuring ipa-custodia to start on boot
Done configuring ipa-custodia.
Configuring certificate server (pki-tomcatd)
  [1/2]: configure certmonger for renewals
  [2/2]: Importing RA key
Done configuring certificate server (pki-tomcatd).
Configuring Kerberos KDC (krb5kdc)
  [1/1]: installing X509 Certificate for PKINIT
Done configuring Kerberos KDC (krb5kdc).
Applying LDAP updates
Upgrading IPA:. Estimated time: 1 minute 30 seconds
  [1/10]: stopping directory server
  [2/10]: saving configuration
  [3/10]: disabling listeners
  [4/10]: enabling DS global lock
  [5/10]: disabling Schema Compat
  [6/10]: starting directory server
  [7/10]: upgrading server
Could not get dnaHostname entries in 60 seconds
Could not get dnaHostname entries in 60 seconds
  [8/10]: stopping directory server
  [9/10]: restoring configuration
  [10/10]: starting directory server
Done.
Finalize replication settings
Restarting the KDC
Configuring SID generation
  [1/7]: adding RID bases
RID bases already set, nothing to do
  [2/7]: creating samba domain object
Samba domain object already exists
  [3/7]: adding admin(group) SIDs
Admin SID already set, nothing to do
Admin group SID already set, nothing to do
  [4/7]: updating Kerberos config
'dns_lookup_kdc' already set to 'true', nothing to do.
  [5/7]: activating sidgen task
  [6/7]: restarting Directory Server to take MS PAC and LDAP plugins changes into account
  [7/7]: adding fallback group
Fallback group already set, nothing to do
Done.
unable to resolve host name freeipa.test.inc. to IP address, ipa-ca DNS record will be incomplete

WARNING: The CA service is only installed on one server (freeipa.test.inc).
It is strongly recommended to install it on another server.
Run ipa-ca-install(1) on another master to accomplish this.

The ipa-replica-install command was successful
Install the CA to the server:
$ ipa-certupdate
$ ipa-server-certinstall -w -d ipa-replica.test.inc.key ipa-replica.test.inc.crt
Restart:
ipactl restart
Restarting Directory Service
Restarting krb5kdc Service
Restarting kadmin Service
Restarting named Service
Restarting httpd Service
Restarting ipa-custodia Service
Restarting ipa-otpd Service
Restarting ipa-dnskeysyncd Service
ipa: INFO: The ipactl command was successful
Check status:
$ ipactl status
Directory Service: RUNNING
krb5kdc Service: RUNNING
kadmin Service: RUNNING
httpd Service: RUNNING
ipa-custodia Service: RUNNING
pki-tomcatd Service: RUNNING
ipa-otpd Service: RUNNING
ipa: INFO: The ipactl command was successful
Test by listing the replicas:
ipa-replica-manage list
freeipa.test.inc: master
ipa-replica.test.inc: master
The replica and original FreeIPA servers are now syncing from each other. So you could wire up other services on another region pointing to the replica’s ldap endpoint.
Keycloak Deployment
Here I’ll show how I deployed Keycloak with docker and how I configured it.
Keycloak Containers
I chose to deploy Keycloak as containers since it offers several practical advantages, like ease of implementation and isolation.
Firstly, I created a custom image to install the CA certificates and build Keycloak to reduce compose time. Create the following /opt/keycloak/Containerfile:
| FROM registry.access.redhat.com/ubi9:9.4 AS ca-builder # Copy your internal CA (the .pem that signed with the .crt) COPY certs/ca.pem /etc/pki/ca-trust/source/anchors/internal-ca.pem RUN update-ca-trust extract FROM quay.io/keycloak/keycloak:26.1 AS kc-builder COPY –from=ca-builder /etc/pki /etc/pki ENV KC_HEALTH_ENABLED=true ENV KC_METRICS_ENABLED=true ENV KC_DB=postgres RUN /opt/keycloak/bin/kc.sh build FROM quay.io/keycloak/keycloak:26.1 COPY –from=kc-builder /opt/keycloak/ /opt/keycloak/ COPY –from=ca-builder /etc/pki /etc/pki ENTRYPOINT [“/opt/keycloak/bin/kc.sh”] |
Now, build the image:
docker build -t custom-keycloak:26.1 -f Containerfile .Then, create a file /opt/keycloak/docker-compose.yaml that will spin up a database and use the custom image:
| services: postgres: image: postgres:16 container_name: keycloak_db volumes: – postgres_data:/var/lib/postgresql/data env_file: keycloak.env environment: POSTGRES_DB: keycloak restart: unless-stopped mem_limit: 512m healthcheck: test: [“CMD-SHELL”, “pg_isready -U keycloak”] interval: 10s timeout: 5s retries: 5 networks: – keycloak_internal # Do NOT expose 5432 to the host – DB is only reachable inside Docker network keycloak: image: custom-keycloak:26.1 container_name: keycloak command: start –optimized –verbose env_file: keycloak.env environment: # Database KC_DB: postgres KC_DB_URL: jdbc:postgresql://postgres:5432/keycloak KC_DB_USERNAME: keycloak # Hostname KC_HOSTNAME: https://keycloak.test.inc:8443 # TLS # Mount your signed cert and key via the volume below KC_HTTPS_CERTIFICATE_FILE: /opt/keycloak/conf/tls/keycloak.test.inc.crt KC_HTTPS_CERTIFICATE_KEY_FILE: /opt/keycloak/conf/tls/keycloak.test.inc.key # Observability KC_HEALTH_ENABLED: “true” KC_METRICS_ENABLED: “true” # Logging KC_LOG_LEVEL: INFO volumes: # Drop your keycloak.test.inc.crt , keycloak.test.inc.key and ca.pem at ./certs – ./certs:/opt/keycloak/conf/tls:ro ports: – “8443:8443” depends_on: postgres: condition: service_healthy restart: unless-stopped mem_limit: 2g networks: – keycloak_internal networks: keycloak_internal: driver: bridge volumes: postgres_data: name: keycloak_postgres_data |
Then create the env file /opt/keycloak/keycloak.env and add your variables:
| POSTGRES_PASSWORD=’91QY3X5w0xULtkYNNmL9raA5I+OjEf9ZJJEl37cQb14=’ POSTGRES_USER=’keycloak’ KC_DB_PASSWORD=’91QY3X5w0xULtkYNNmL9raA5I+OjEf9ZJJEl37cQb14=’ KC_BOOTSTRAP_ADMIN_PASSWORD=’W8mKWx3lIJS4Q8adBWkAXkbMbSV1q0rr1qSw26b+yEs=’ |
Keycloak as a Service
I decided to handle Keycloak as a service since I would like the overall app be able to survive a VM reboot.
Firstly, create the file /etc/systemd/system/keycloak-stack.service and write inside:
| [Unit] Description=Keycloak Stack Requires=docker.service After=docker.service network-online.target Wants=network-online.target [Service] Type=simple WorkingDirectory=/opt/keycloak/ ExecStart=/usr/bin/docker compose up –remove-orphans ExecStop=/usr/bin/docker compose down Restart=on-failure RestartSec=10 TimeoutStartSec=300 TimeoutStopSec=120 [Install] WantedBy=multi-user.target |
Then enable and start the services:
$ systemctl enable --now docker
$ systemctl daemon-reload
$ systemctl enable --now keycloak-stack.service
Look at the status:
$ systemctl status keycloak-stack.service
● keycloak-stack.service - Keycloak Stack
     Loaded: loaded (/etc/systemd/system/keycloak-stack.service; enabled; preset: enabled)
     Active: active (running) since Tue 2026-04-14 13:51:49 UTC; 1min ago
   Main PID: 1493362 (docker)
      Tasks: 18 (limit: 4600)
     Memory: 16.0M (peak: 18.0M)
        CPU: 288ms
     CGroup: /system.slice/keycloak-stack.service
             ├─1493362 /usr/bin/docker compose up --remove-orphans
             └─1493378 /usr/libexec/docker/cli-plugins/docker-compose compose up --remove-orphans
Keycloak Configuration
Sign in into Keycloak on https://keycloak.test.inc:8443 , then log in as the temp-admin user with the provided password mentioned at the .env file.
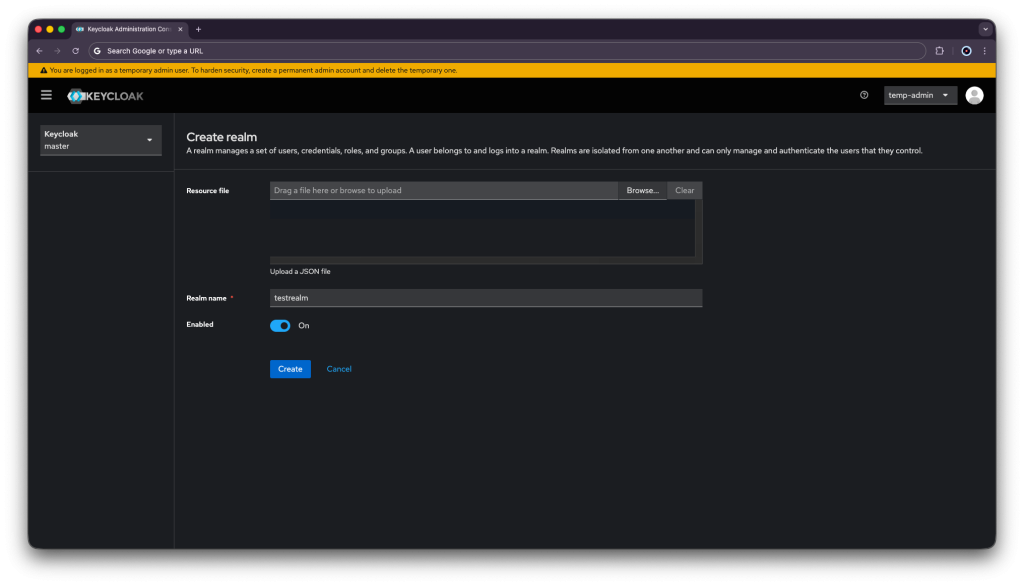
Add a realm:
- Click Create Realm next to Current realm.
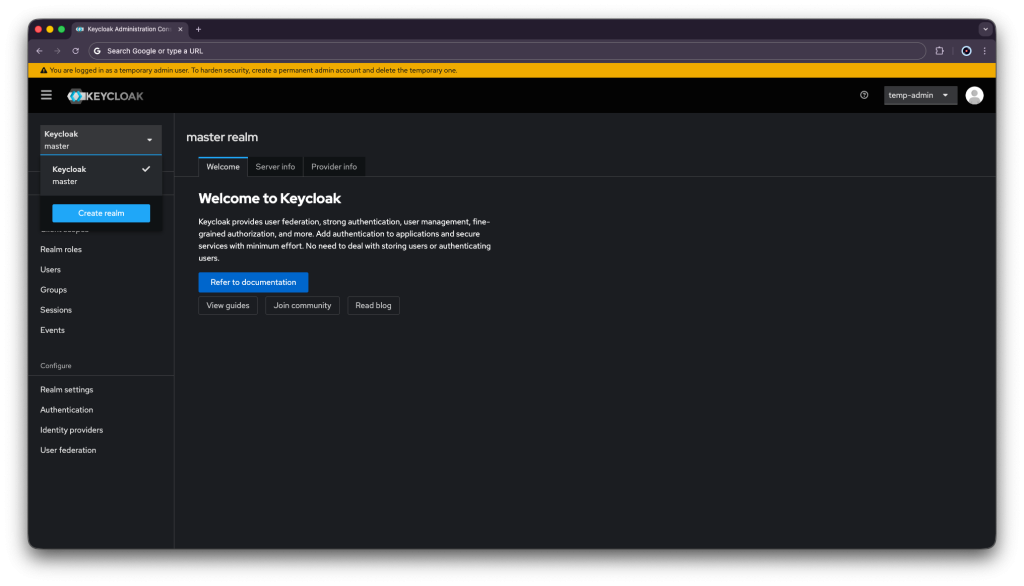
- Enter a realm in the Realm name field.
- Click Create.
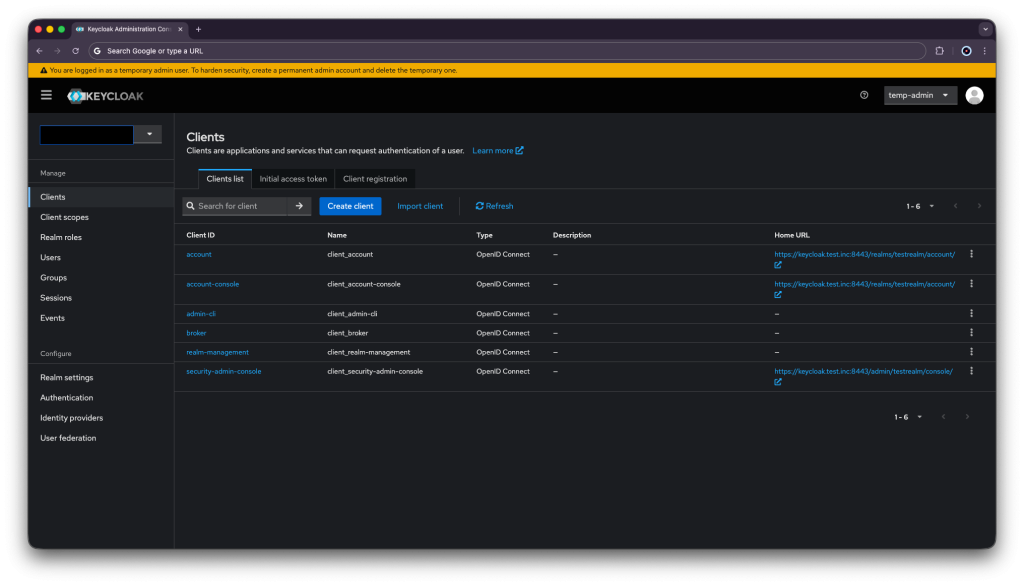
Secure your application:
- Open the Keycloak Admin Console.
- Click testrealm next to Current realm.
- Click Clients.
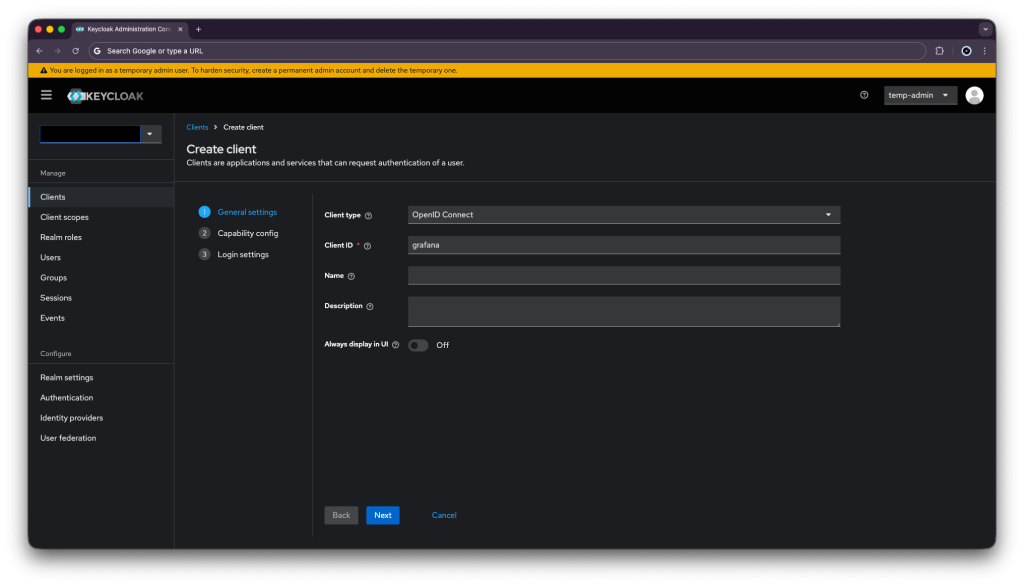
- Click Create client.
- Fill in the form with the following values:
- Client type:
OpenID Connect - Client ID: ID for grafana ( that will be out test app )
- Client type:
- Click Next
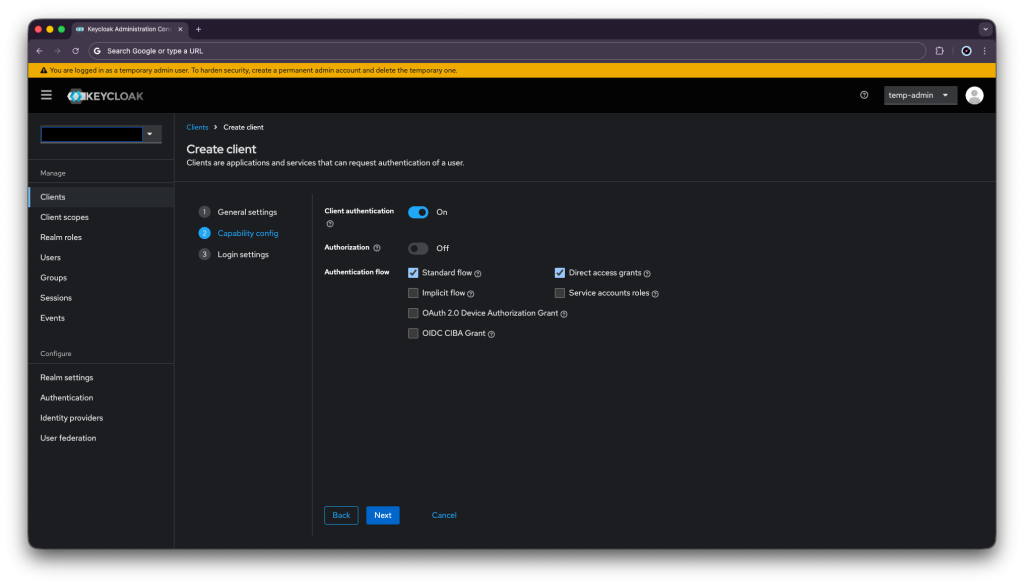
- Confirm that Standard flow and Client authentication are enabled.
- Click Next.
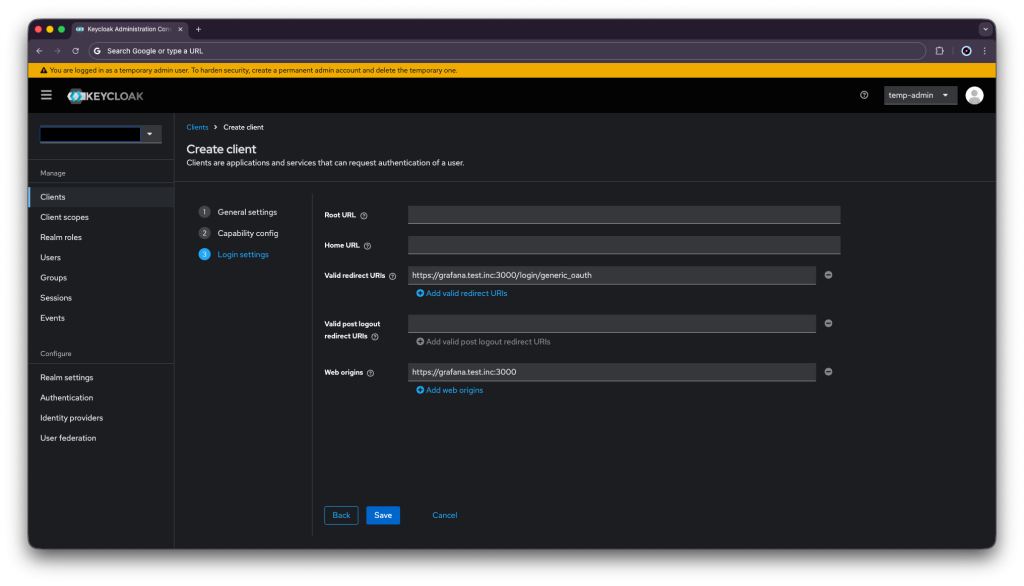
- Make these changes under Login settings.
- Set Valid redirect URIs to https://grafana.test.inc:3000/login/generic_oauth
- Set Web origins to https://grafana.test.inc:3000
- Click Save.
This is to basically redirects from https://grafana.test.inc:3000/login/generic_oauth to Keycloak. After signing in, the browser will save a cookie from Keycloak with the token and send it back to Grafana. As long as the cookie exists in the browser the user will not have to enter the credencials again.
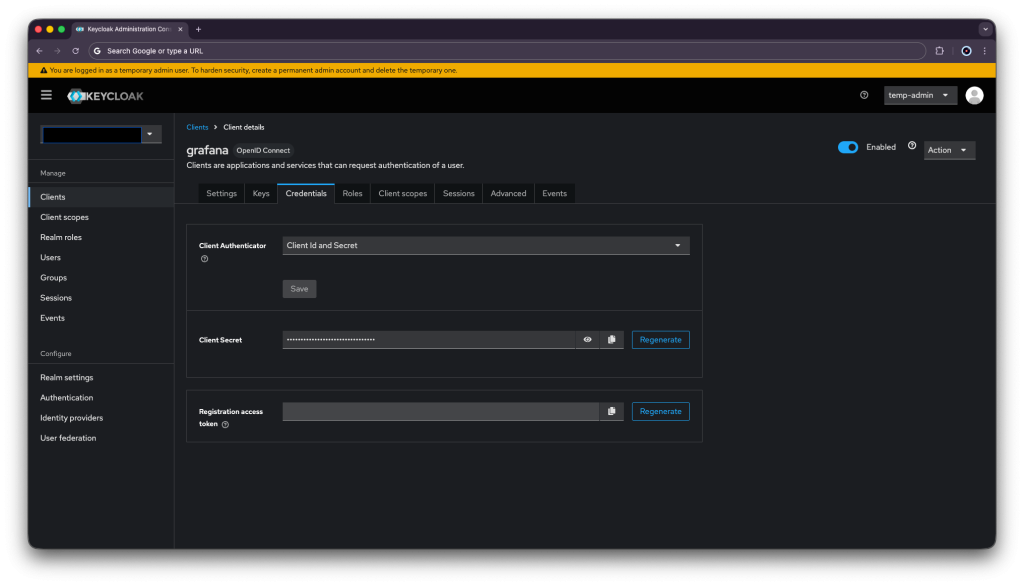
Go to the client you just created → Credentials tab and Copy the Client secret , we will use this secret on the test app’s (Grafana) deployment:
Now a group mapper is needed in order to control user privileges on the FreeIPA level. If a user is under the group grafana-admins , it will get the role of admin on the app.
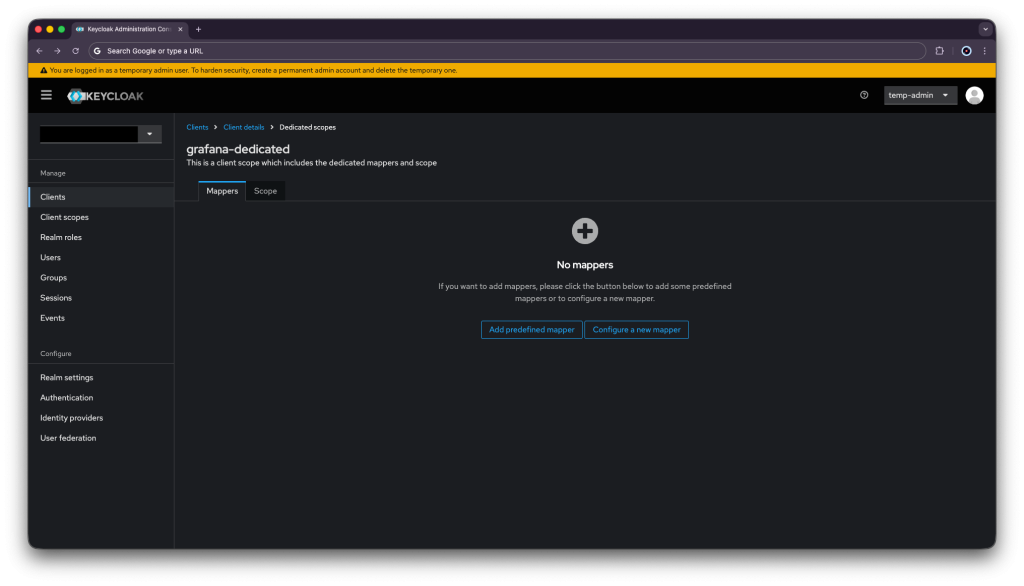
Go to: Client scopes → click grafana-dedicated.
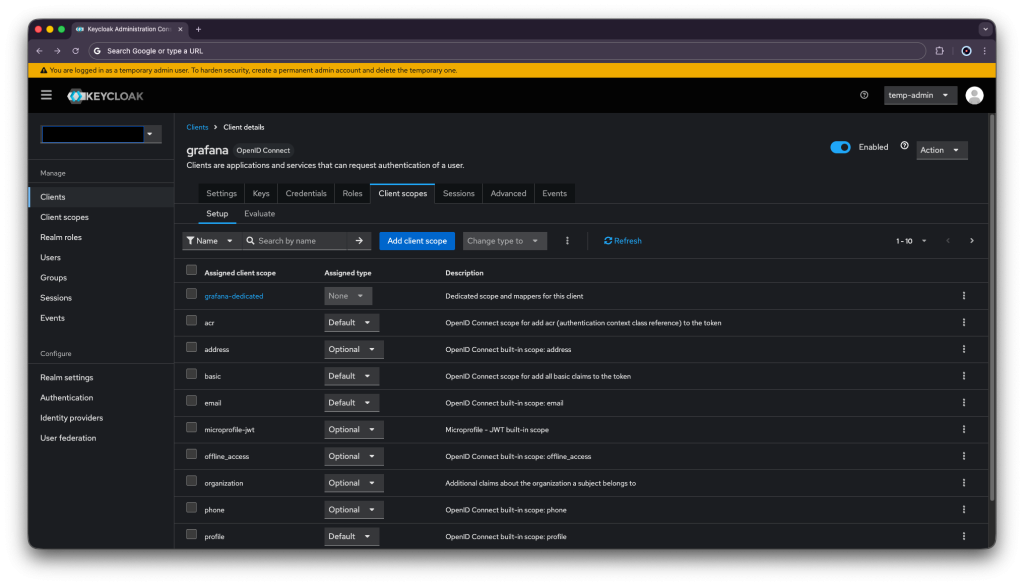
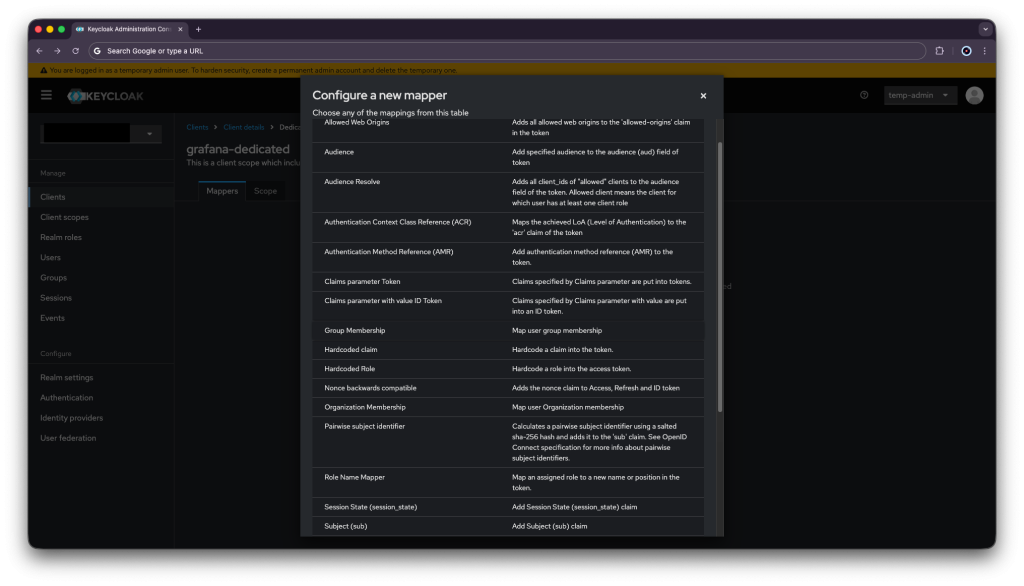
Then, press Configure a new mapper.
Afterwards, choose Group Membership.
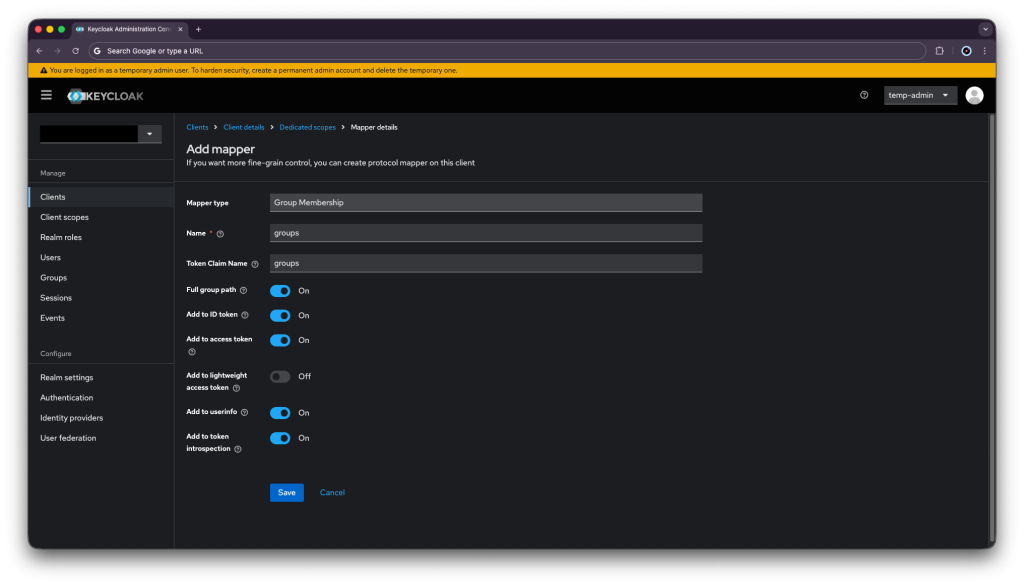
Enter your mapper details and press save.
| Name | groups |
| Token Claim Name | groups |
Keycloak is now configured to our needs.
Configure Keycloak User Federation
Go to: https://keycloak.test.inc:8443 → Admin Console → your realm → User Federation → Add LDAP provider.
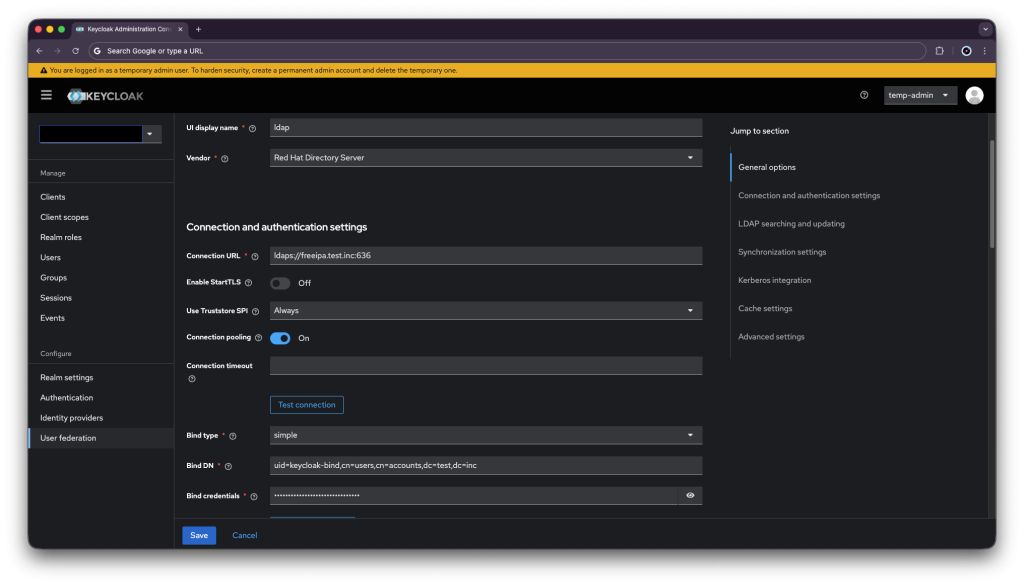
Input your connection detail (don’t forget to enter the bind user’s password):
| Vendor | Red Hat Directory Server |
| Connection URL | ldaps://freeipa.test.inc:636 |
| Enable StartTLS | No |
| Bind Type | simple |
| Bind DN | uid=keycloak-bind,cn=users,cn=accounts,dc=test,dc=inc |
| Bind Credentials | bindpass |
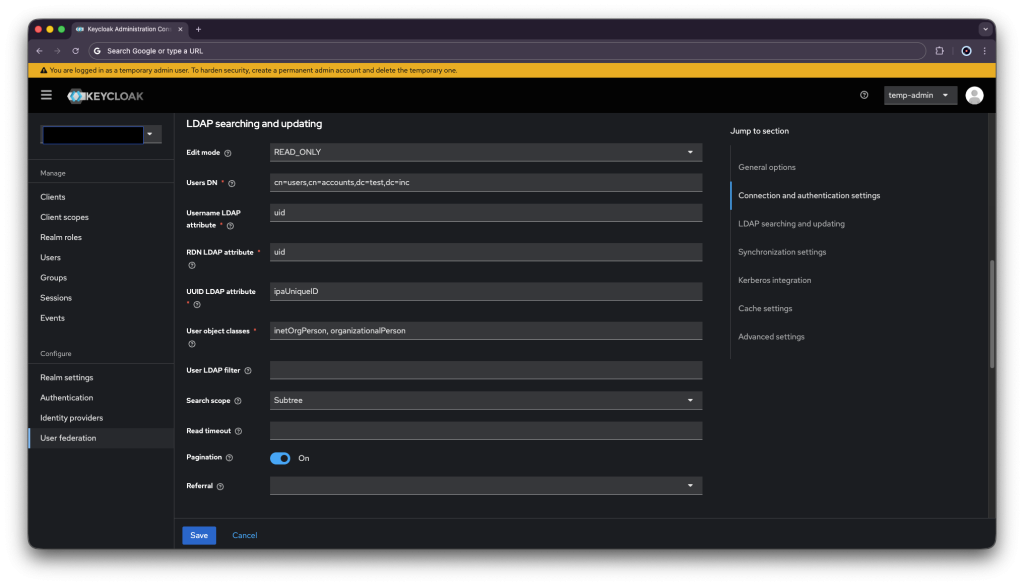
| Edit Mode | READ_ONLY |
| Users DN | cn=users,cn=accounts,dc=test,dc=inc |
| Username LDAP attribute | uid |
| RDN LDAP attribute | uid |
| UUID LDAP attribute | ipaUniqueID |
| User Object Classes | inetOrgPerson, organizationalPerson |
| Search Scope | Subtree |
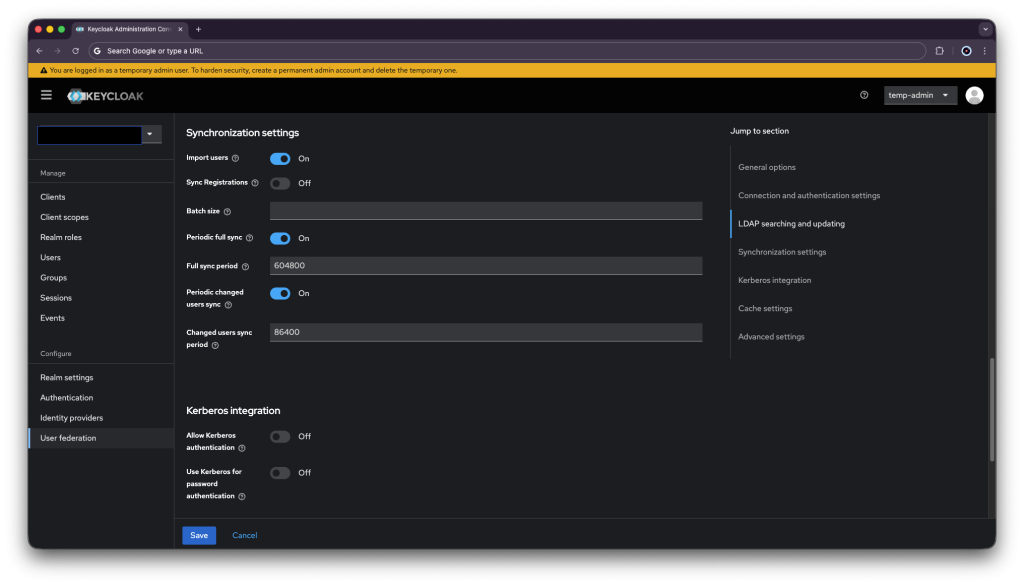
| Import Users | On |
| Sync Registrations | Off |
| Periodic Full Sync | On |
| Periodic Changed Users Sync | On |
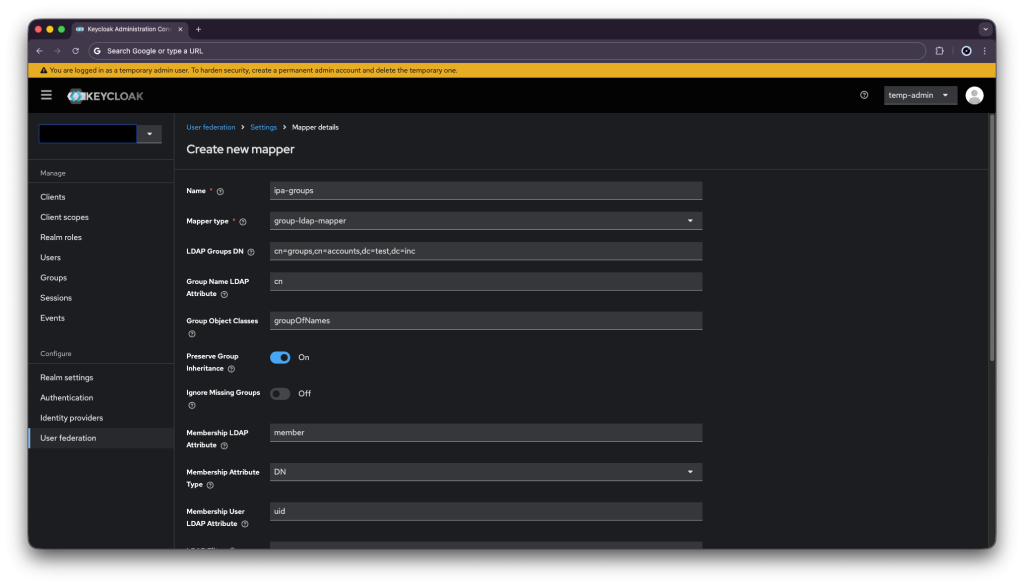
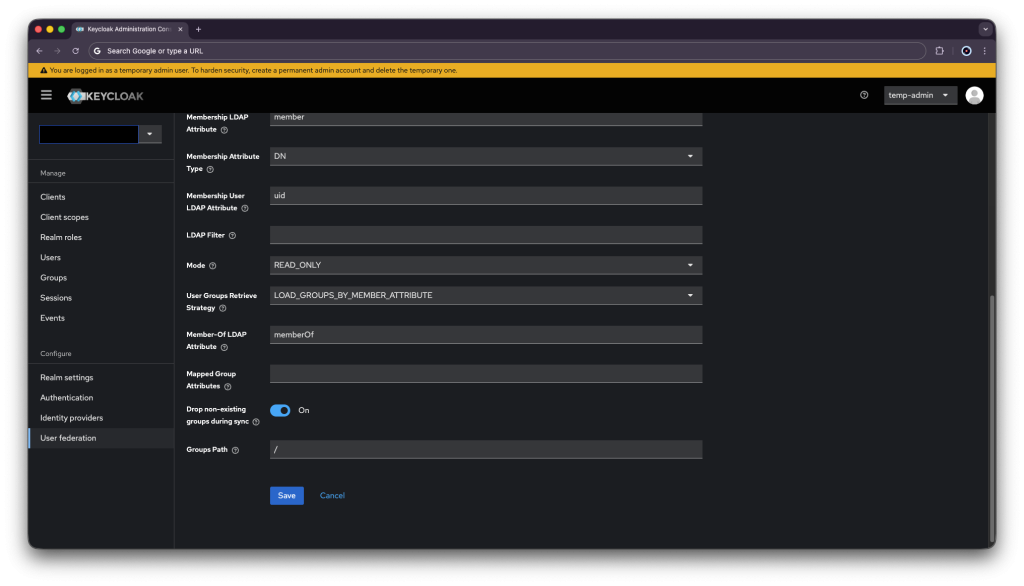
Add Group Mapper by going to Mappers tab → Add mapper:
| Name | ipa-groups |
| Mapper type | group-ldap-mapper |
| LDAP Groups DN | cn=groups,cn=accounts,dc=test,dc=inc |
| Group Name LDAP Attribute | cn |
| Group Object Classes | groupOfNames |
| Membership LDAP Attribute | member |
| Membership Attribute Type | DN |
| Membership User LDAP Attribute | uid |
| Mode | READ_ONLY |
| Drop non-existing groups during sync | On |
Trigger Initial User Sync:
In the LDAP provider page → Action dropdown → Sync all users. FreeIPA users will now appear under Users in Keycloak.
Keycloak is now up and serving the SSO. All that is left now is to deploy an app to test it.
Test Application Deployment
Since I would like an app that will serve the SSO, I will deploy a Grafana app.
Firstly create a file called /opt/grafana/docker-compose.yaml and write into the file on Grafana’s VM:
| services: grafana: image: grafana/grafana:11.5.2 container_name: grafana ports: – “3000:3000” volumes: – grafana_data:/var/lib/grafana # Mount your grafana.test.inc.crt, grafana.test.inc.key, AND # your internal CA into this directory – ./certs:/etc/grafana/certs:ro env_file: grafana.env environment: GF_SERVER_PROTOCOL: https GF_SERVER_CERT_FILE: /etc/grafana/certs/grafana.test.inc.crt GF_SERVER_CERT_KEY: /etc/grafana/certs/grafana.test.inc.key GF_SERVER_ROOT_URL: https://grafana.test.inc:3000 # Keycloak OIDC GF_AUTH_GENERIC_OAUTH_ENABLED: “true” GF_AUTH_GENERIC_OAUTH_NAME: Keycloak GF_AUTH_GENERIC_OAUTH_ALLOW_SIGN_UP: “true” GF_AUTH_GENERIC_OAUTH_CLIENT_ID: grafana GF_AUTH_GENERIC_OAUTH_SCOPES: openid profile email GF_AUTH_GENERIC_OAUTH_AUTH_URL: https://keycloak.test.inc:8443/realms/testrealm/protocol/openid-connect/auth GF_AUTH_GENERIC_OAUTH_TOKEN_URL: https://keycloak.test.inc:8443/realms/testrealm/protocol/openid-connect/token GF_AUTH_GENERIC_OAUTH_API_URL: https://keycloak.test.inc:8443/realms/testrealm/protocol/openid-connect/userinfo GF_AUTH_GENERIC_OAUTH_LOGIN_ATTRIBUTE_PATH: preferred_username GF_AUTH_GENERIC_OAUTH_USE_PKCE: “true” GF_AUTH_GENERIC_OAUTH_TLS_CLIENT_CA: /etc/grafana/certs/ca.pem # Map Keycloak realm roles to Grafana roles GF_AUTH_GENERIC_OAUTH_ROLE_ATTRIBUTE_PATH: >- contains(groups[*], ‘/grafana-admins’) && ‘Admin’ || contains(groups[*], ‘/grafana-editors’) && ‘Editor’ || contains(groups[*], ‘/grafana-viewers’) && ‘Viewer’ GF_AUTH_GENERIC_OAUTH_ALLOWED_GROUPS: “/grafana-admins,/grafana-editors,/grafana-viewers” GF_AUTH_GENERIC_OAUTH_GROUPS_ATTRIBUTE_PATH: groups # Uncomment the line below ONLY after you have verified SSO works end-to-end # GF_AUTH_DISABLE_LOGIN_FORM: “true” restart: unless-stopped mem_limit: 512m healthcheck: test: [“CMD-SHELL”, “curl -sf -k https://localhost:3000/api/health || exit 1”] interval: 30s timeout: 10s retries: 3 start_period: 30s volumes: grafana_data: name: grafana_persistent_data |
Then create the env file /opt/grafana/grafana.env , and paste the client secret you copied before:
| GF_SECURITY_ADMIN_USER=admin GF_SECURITY_ADMIN_PASSWORD=HuhfgHiud782hHhbfL012M08 GF_AUTH_GENERIC_OAUTH_CLIENT_SECRET=dDY2h4ypwA6OJ680O48YQBsHnd1Byh62 |
Use docker compose as a service as mentioned at Keycloak installation before by creating the file /etc/systemd/system/keycloak-stack.service and writing inside:
| [Unit] Description=Keycloak Stack Requires=docker.service After=docker.service network-online.target Wants=network-online.target [Service] Type=simple WorkingDirectory=/opt/grafana/ ExecStart=/usr/bin/docker compose up –remove-orphans ExecStop=/usr/bin/docker compose down Restart=on-failure RestartSec=10 TimeoutStartSec=300 TimeoutStopSec=120 [Install] WantedBy=multi-user.target |
Now enable and start the services:
$ systemctl enable –now docker
$ systemctl daemon-reload
$ systemctl enable –now keycloak-stack.service
Check the service:
$ systemctl status keycloak-stack.service
● keycloak-stack.service - Keycloak Stack
     Loaded: loaded (/etc/systemd/system/keycloak-stack.service; enabled; preset: enabled)
     Active: active (running) since Tue 2026-04-14 13:51:49 UTC; 1min ago
   Main PID: 555271 (docker)
      Tasks: 19 (limit: 4600)
     Memory: 16.0M (peak: 18.0M)
        CPU: 548ms
     CGroup: /system.slice/keycloak-stack.service
             ├─555271 /usr/bin/docker compose up --remove-orphans
             └─555287 /usr/libexec/docker/cli-plugins/docker-compose compose up --remove-orphans
Grafana is now running. Let’s do a little test to see all the pieces in action.
User Test
Under ipa-replica VM (or freeipa VM if you haven’t configured a replica), add a user and add it to grafana-admins group:
$ ipa user-add itayoctopuscs  --first=itay   --last=ben-hur   --password
$ ipa group-add-member grafana-admins --users=itayoctopuscs
Wait for Keycloak to sync from FreeIPA or press in the LDAP provider page → Action dropdown → Sync all users.
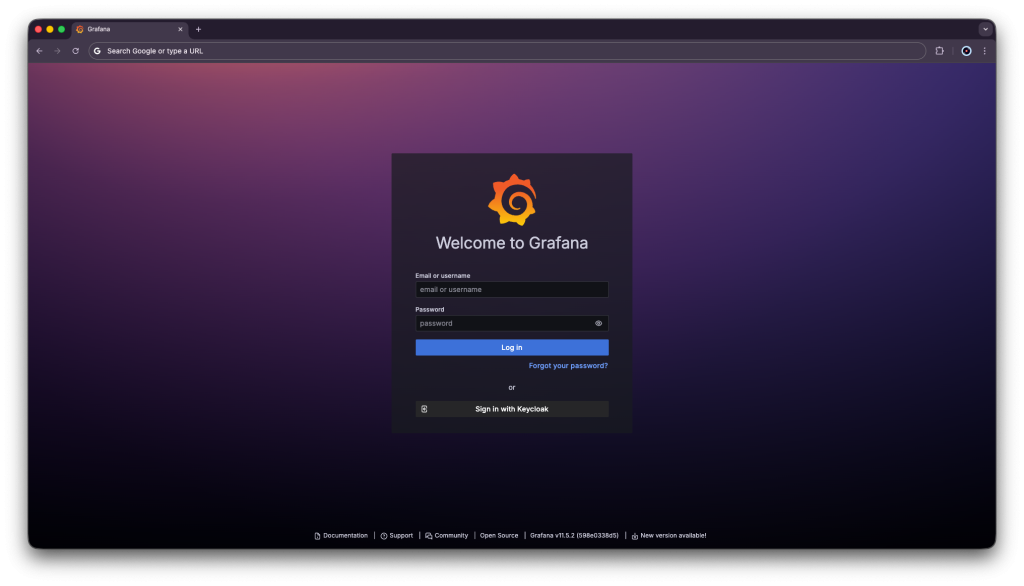
Go to https://grafana.test.inc:3000 and click Sign in with Keycloak.
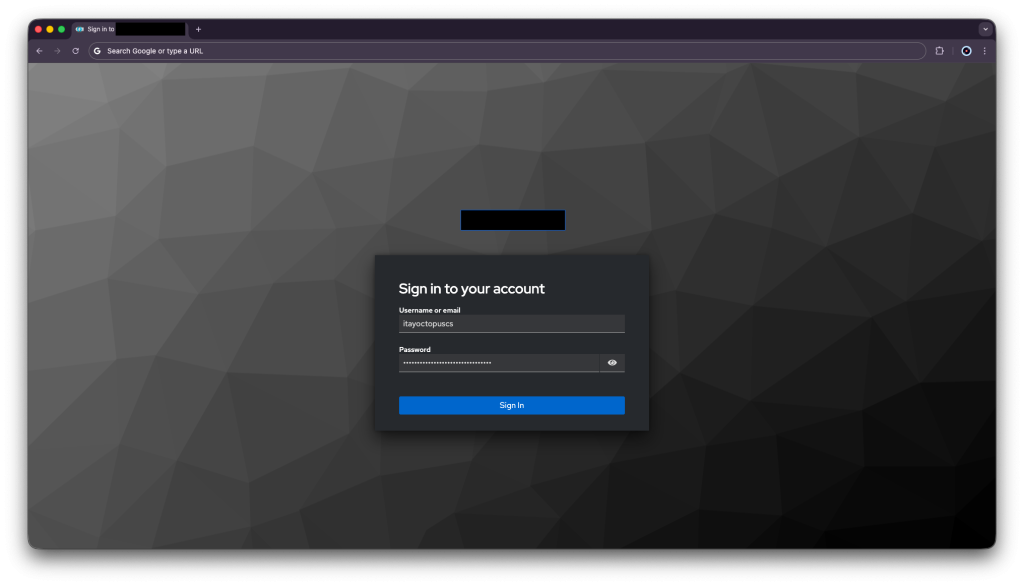
Enter your credancials and press Sign in:
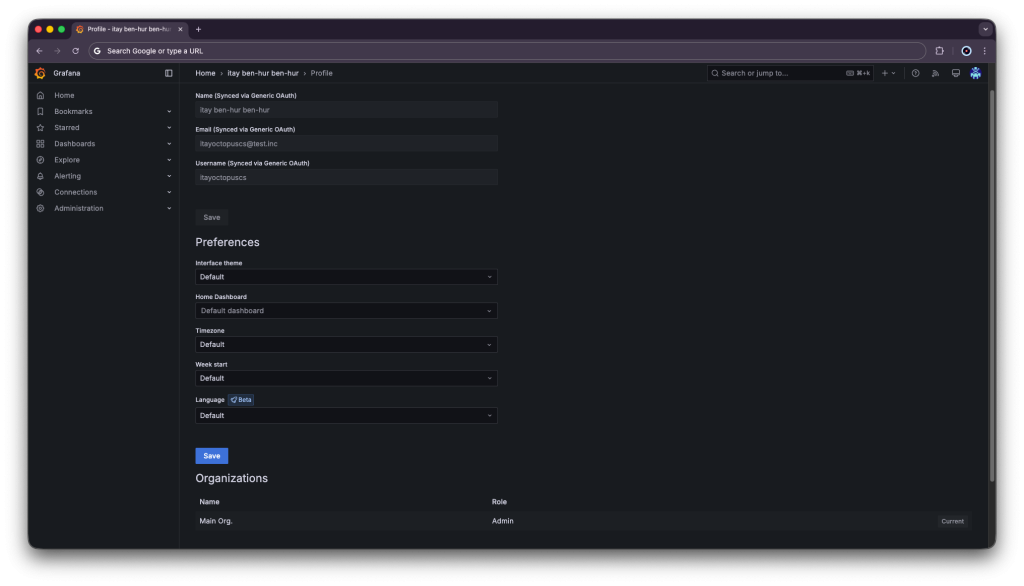
You will be logged in to Grafana, go to profile under top the right corner

Scroll down a bit and verify the user got the admin role:
Summary
This guide walked you through how to deploy SSO with FreeIPA and Keycloak. Now you can manage your users from a single source. One set of credentials for every user that works across all your tools. You can now make different groups for tools and privileges in them, and add just the right users for the job.